Table of Contents
Summary
VCD requires an NFS share to be present in order for it to have a central location for databases, images, etc. This procedure goes over how to move that NFS mount from one machine to another. For this use-case the NFS mount is located on a Windows machine.
Process
- Log into the VAMI interface https://URL:5480 and determine the primary appliance.
- Putty into all the vCloud Director cell.
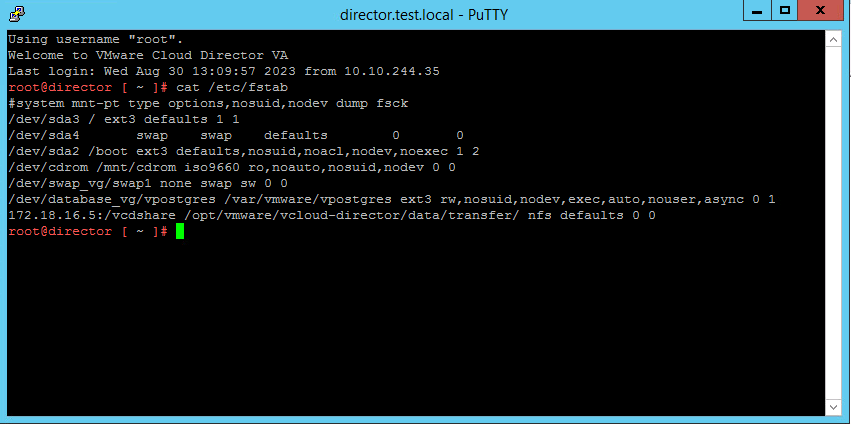
- cat out fstab so you can examine the current mounts:
cat /etc/fstab
- List the directories of the nfs mounts.
ls /opt/vmware/vcloud-director/data/transfer/
- Shutdown cloud director services on all appliances.
/opt/vmware/vcloud-director/bin/cell-management-tool -u administrator cell --shutdown
- Stop the appliance-sync timer service.
systemctl stop appliance-sync.timer
- On the primary appliance we need to create a new mount point for NFS.
mkdir /opt/vmware/vcloud-director/data/transfer-new/
- On the primary appliance we will now mount the NEW NFS server. If you are using a Windows NFS mount then you will need to specify the version of the NFS using ‘nfsvers=3’.
mount -t nfs -o nfsvers=3 IP_ADDRESS:/vcdshare /opt/vmware/vcloud-director/data/transfer-new/
- Ensure the new directory is completely empty, if it is not then you will need to clean it out or create a new NFS share that is empty.
ls /opt/vmware/vcloud-director/data/transfer-new/
- We will now copy (recursively) all files from the original NFS mount to the new NFS mount. Depending on the number of folders and files this process could take a while to complete.
cp -R /opt/vmware/vcloud-director/data/transfer/* /opt/vmware/vcloud-director/data/transfer-new/
- After all of the files are copied we need to run a quick check, for that it will be a ‘diff’ which will verify the files are the same.
diff -r --brief /opt/vmware/vcloud-director/data/transfer/ /opt/vmware/vcloud-director/data/transfer-new/
- Unmount the new NFS mount point.
umount /opt/vmware/vcloud-director/data/transfer-new/
- Delete the directory we created and mounted the NFS into.
rmdir /opt/vmware/vcloud-director/data/transfer-new/
- Update the mount information in fstab file by opening the file and update the line below using vi /etc/fstab. NOTE: This needs to be done for all cells, additionally because we are using a Windows machine for NFS you will note the nfssvers version is specifically set.
- Update line:
ORG_IP_ADDRESS:/vcdshare /opt/vmware/vcloud-director/data/transfer/ nfs defaults 0 0 - To:
NEW_IP_ADDRESS:/vcdshare /opt/vmware/vcloud-director/data/transfer/ nfs nfsvers=3 0 0
- Update line:
- Unmount the original NFS share.
umount /opt/vmware/vcloud-director/data/transfer/
- Run the mount command and it will run through fstab and mount any new mounts listed there.
mount -a
- Recursively update the owner of the files within the new NFS mount point.
chown -R vcloud:vcloud /opt/vmware/vcloud-director/data/transfer/
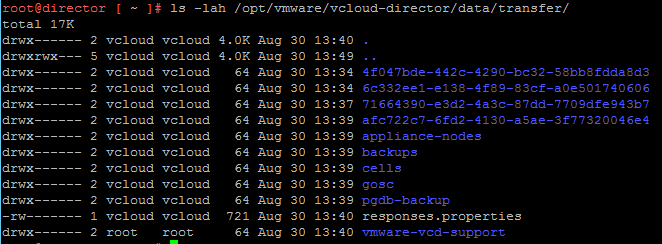
- Verify that vcloud user/group is now owner of all directories and files.
ls -lah /opt/vmware/vcloud-director/data/transfer/
- Finally we start back up the VMware services.
systemctl start appliance-sync.timer
systemctl start vmware-vcd
- Verify that VCD is working as expected.
Errors
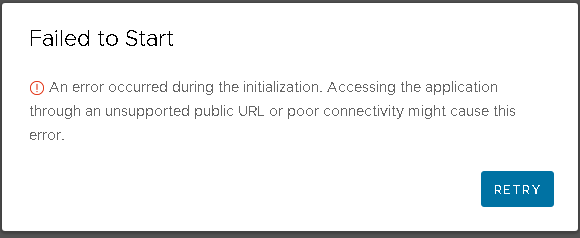
Error: VCD refuses to start properly, when attempting to login it sits on a gray screen, or displays an error of invalid URL.
Failed to Start An error occurred during the initialization. Accessing the application through an unsupported public URL or poor connectivity might cause this error.

Within the cell-runtime.log file, located at /opt/vmware/vcloud-director/logs/ you will see an error similar to the following:
ERROR | Cell Application | StartupVerifierRunnerStartupAction | Error starting application: Transfer spooling area is not writable: VfsFile[fileObject=file:///opt/vmware/vcloud-director/data/transfer]
Fix: Ensure that all files and folders were recursively updated ownership to vcloud using the ‘chown’ command above.
VMware Documentation
Replace the Transfer Server Storage for the VMware Cloud Director Appliance