Table of Contents
- Table of Contents
- Overview
- The error
- Confirmations
- Addressing NIC teaming policy
- Removing the Uplink from the Distributed Switch
Overview
The proper procedure for removing an uplink across all hypervisors on a distributed switch.
The error
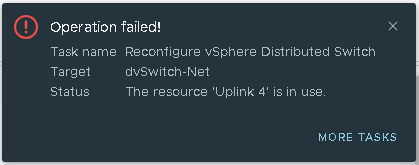
When you attempt to delete an uplink from a distributed port group you will receive an error similar to “The resource ‘Uplink 4’ is in use.” and the error from the task will read “The resource ‘Uplink 4’ is in use. Uplink or Link Aggregation group name Uplink 4 is in use by the teaming policy defined at DVPortgroup dvpg-#####”
 \
\
Confirmations
It is critical that we confirm the uplink is not in-use anywhere within the distributed switch. In vCenter perform the following:
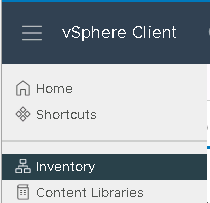
- Navigate to inventory → Network.
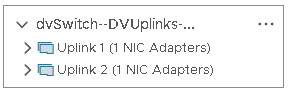
- Expand the appropriate data center and distributed switch and select the DVUPlinks group and select the ‘Ports’ tab.
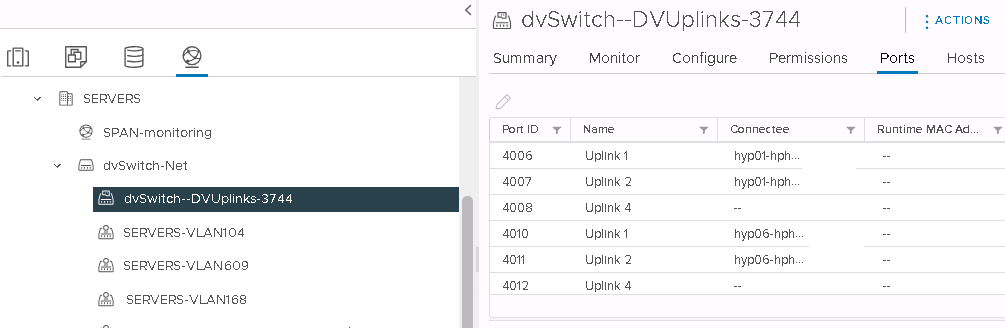
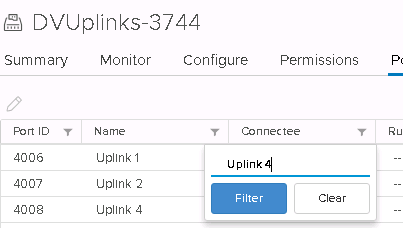
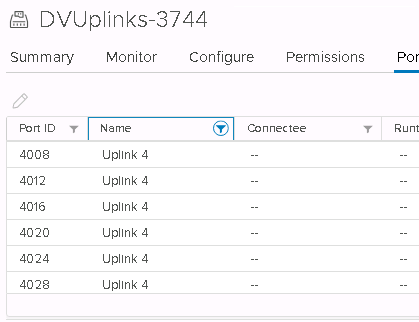
- On the name column select the filter and search for your appropriate uplink, the result should not be associated with a ‘Connectee’, if it is then you will need to resolve that before proceeding.
Addressing NIC teaming policy
- Navigate to inventory → Network.
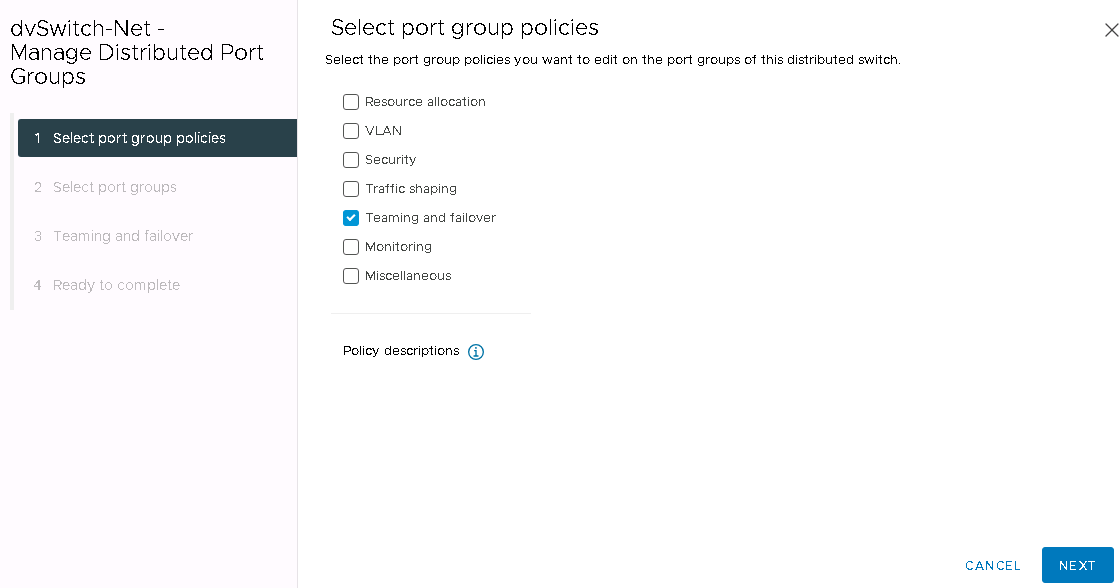
- Expand the appropriate data center and distributed switch and select the Distributed Switch and select ‘Actions’ → ‘Distributed Port Group’ → ‘Manage Distributed Port Groups’.

- In the wizard on the ‘Select port group policies’ select the tick box for ‘Teaming and failover’ and select ‘Next’.
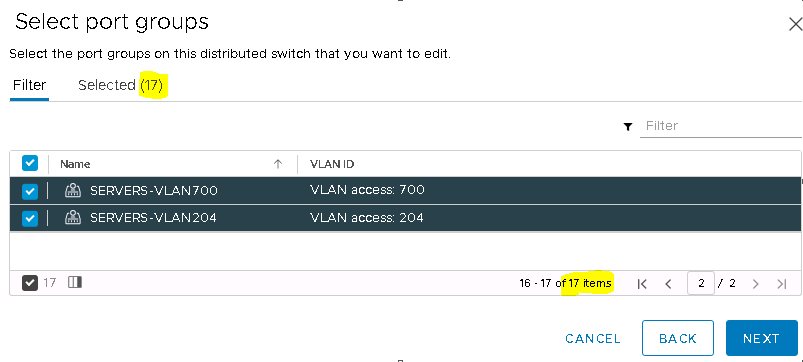
- On the Filter page click the big check box at the top to select all of the port groups, then scroll down and click the right arrow and repeat for all subsequent pages (as required) and select ‘Next’.
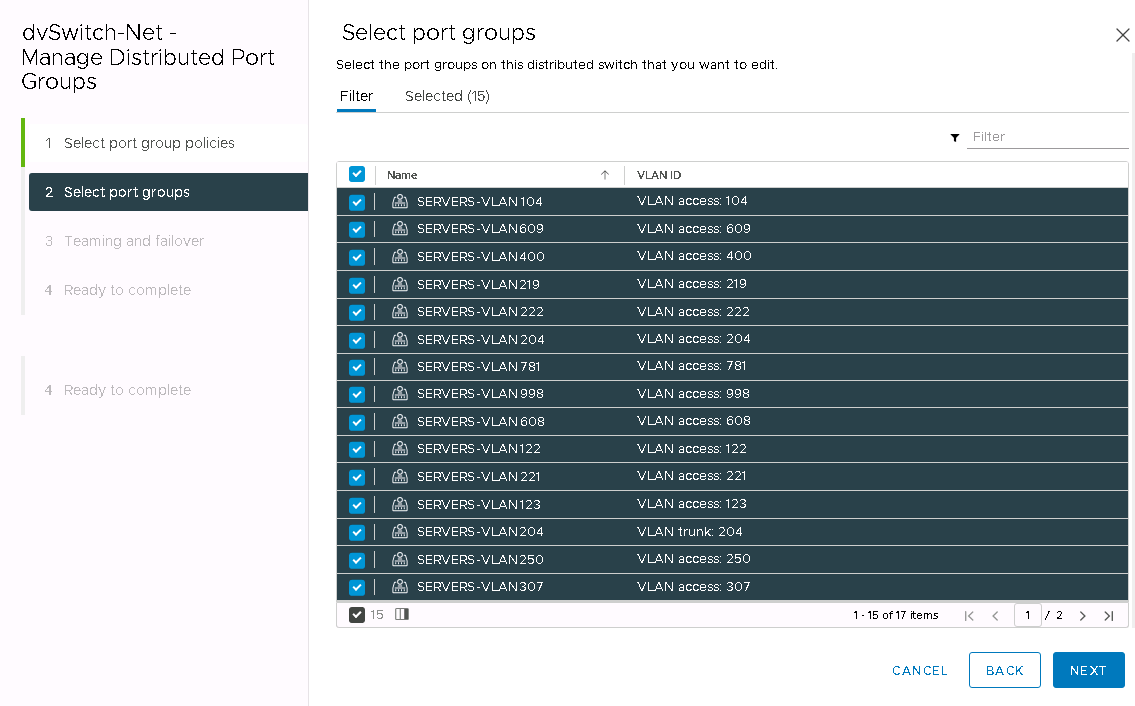
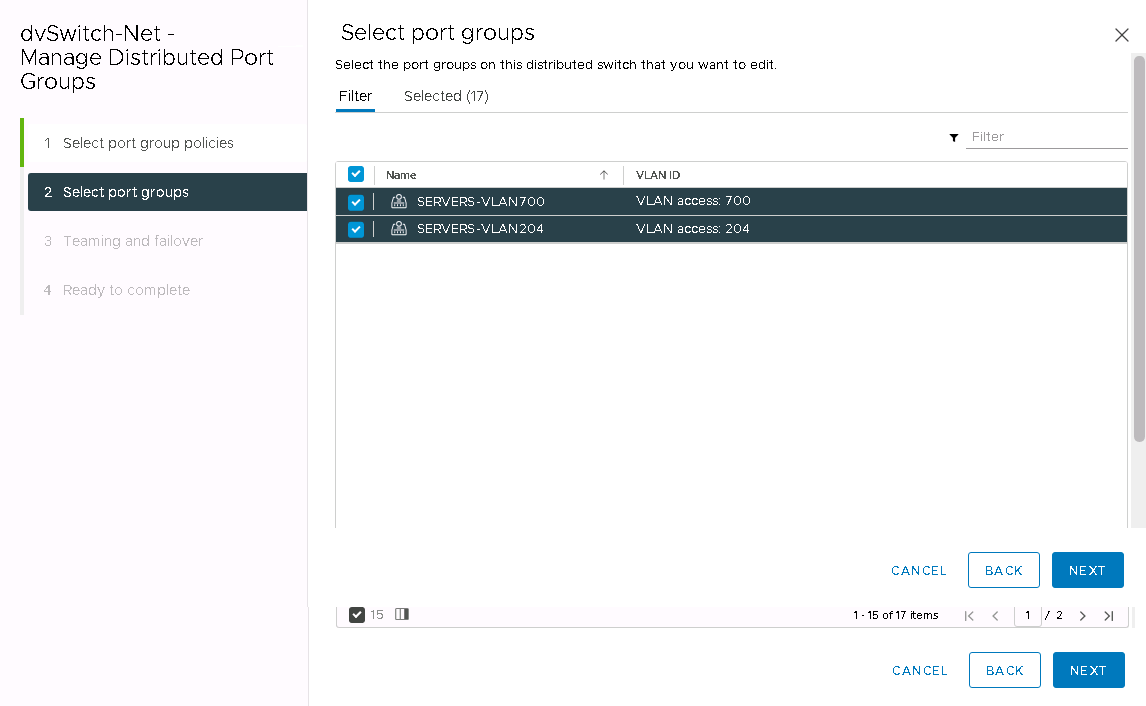
NOTE: As you select more the ‘Selected’ count should increase and it should equal to the total amount of port groups.
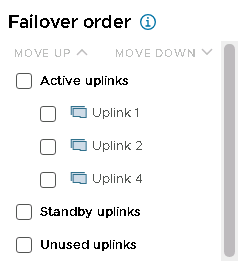
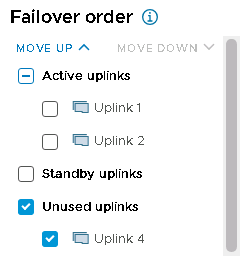
- On the ‘Failover order’ select the appropriate uplink and click ‘MOVE DOWN’ until it is in the ‘Unused uplinks’ group and select ‘Next’.
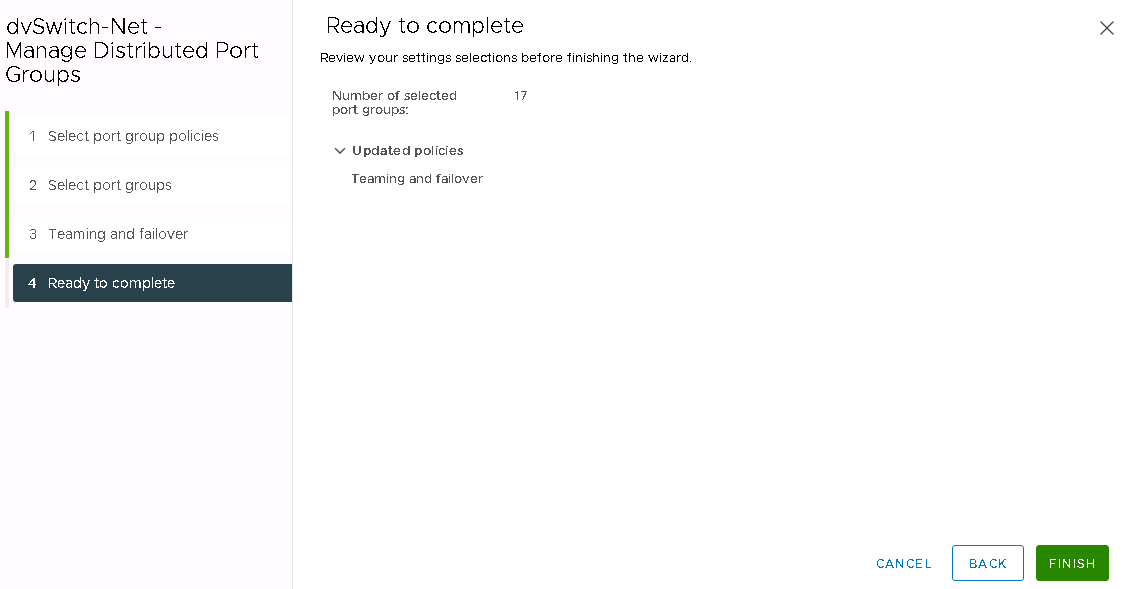
- Confirm the ‘Number of selected port gorups:’ matches the value from above and ‘Finish’ out the wizard allowing the tasks to complete.
Removing the Uplink from the Distributed Switch
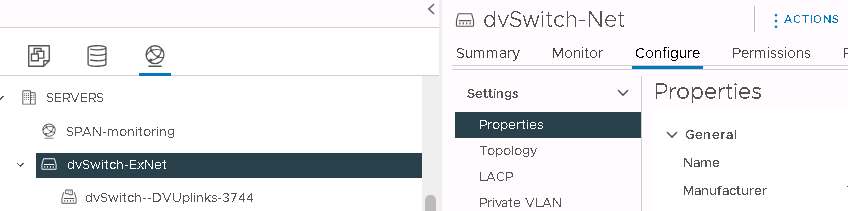
- Navigate to inventory → Network.
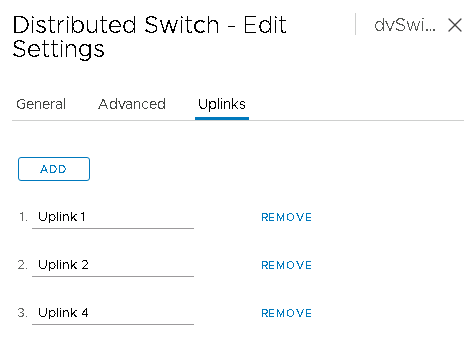
- Expand the appropriate data center and distributed switch and select the Distributed Switch and select ‘Configure’ tab and then select ‘Properties’ and finally click the ‘EDIT’ button.

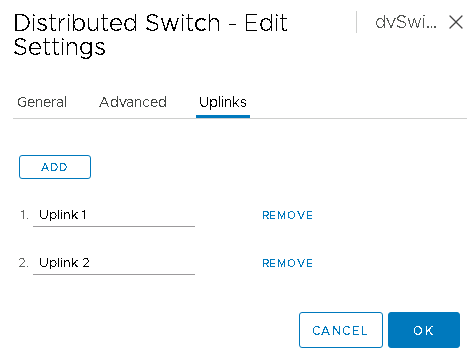
- Click on the ‘Uplinks’ tab and click ‘REMOVE’ by the Uplink you want to remove from the distributed switch and click ‘OK’ allowing the tasks to complete.
- Now when you navigate back to the hypervisor’s ‘Virtual switches’ and expand the distributed switch you will see the Uplink has been removed.